How to Set Up a Secure Wi-Fi Network at Home
A secure home Wi-Fi network is essential for protecting your personal information and devices from potential threats. This tutorial will guide you through the process of setting up a secure Wi-Fi network, ensuring your online activities remain private and safe.
What You'll Need
- A Wi-Fi router (most modern routers have built-in security features)
- A computer or smartphone to configure the router
- Your Internet Service Provider (ISP) account information
Step 1: Connect to Your Router
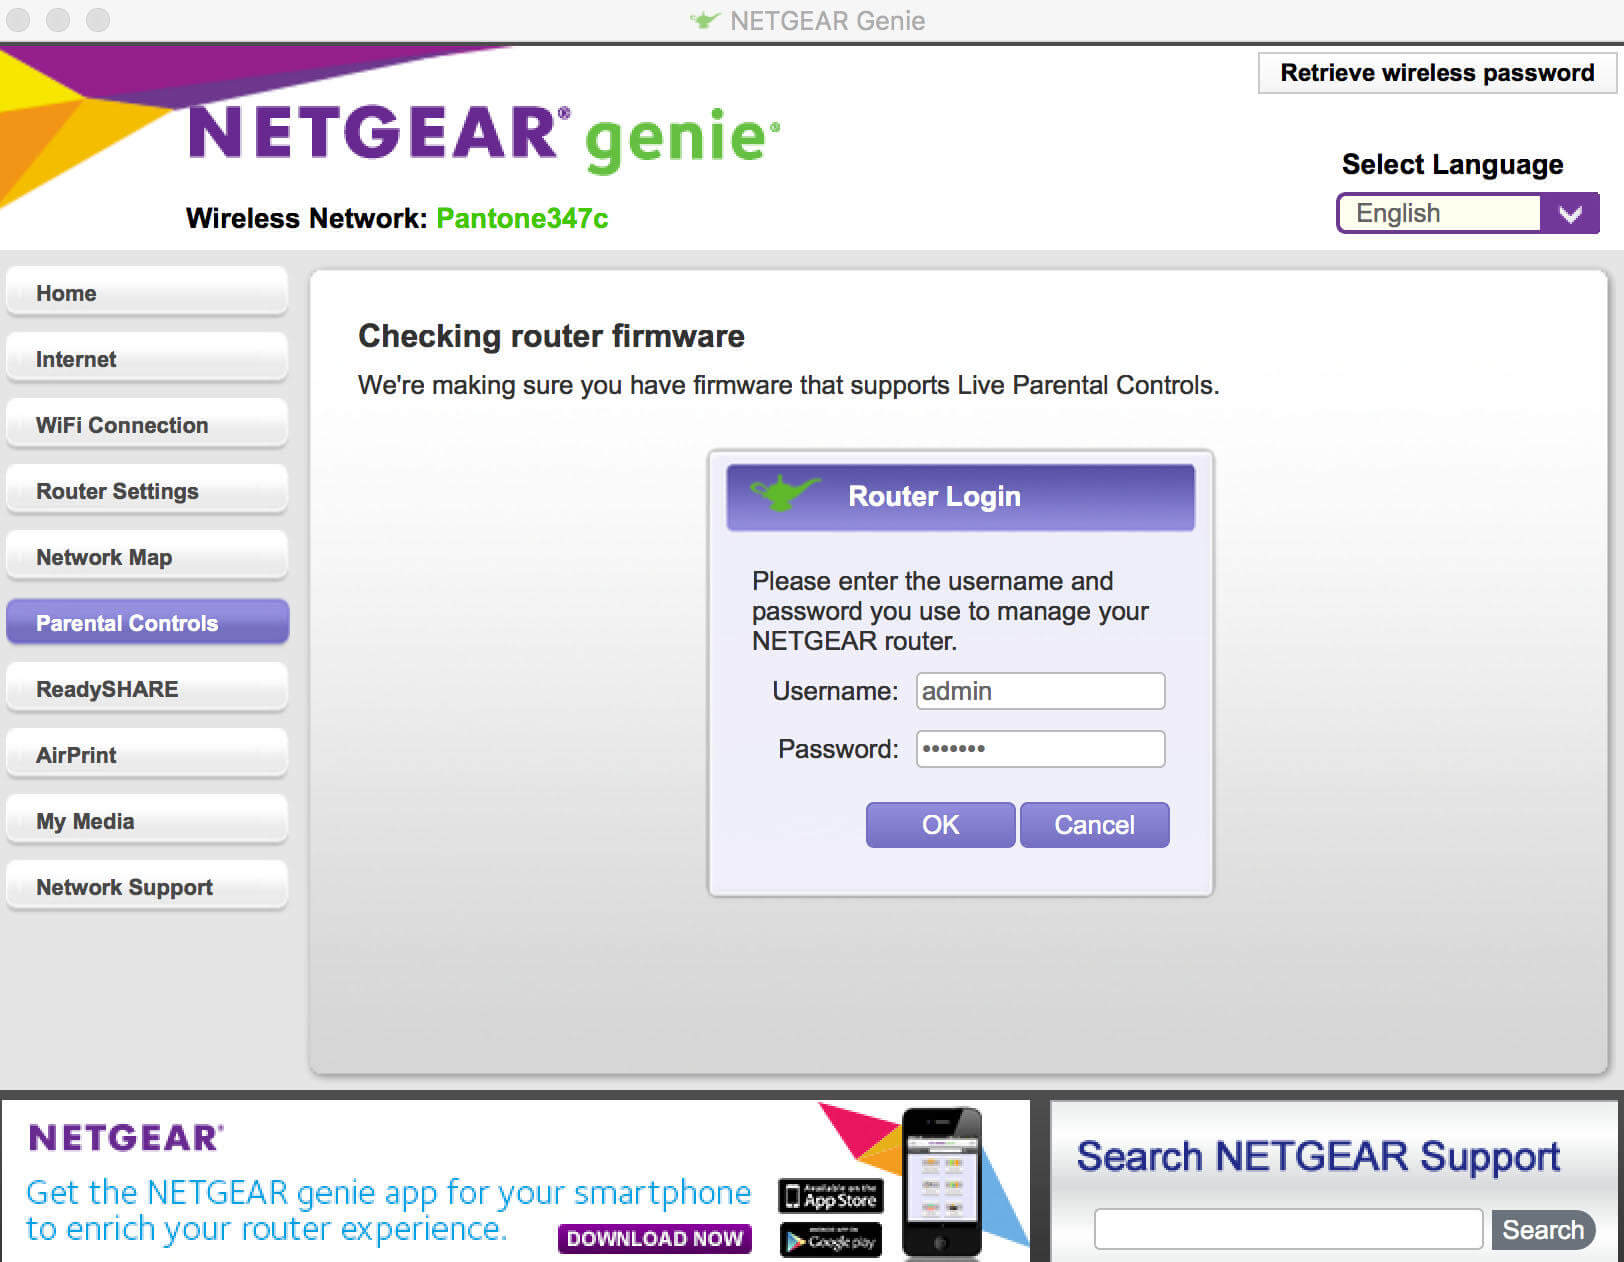
First, you need to access your router's administration page:
- Connect your computer to the router using an Ethernet cable or the default Wi-Fi network (usually printed on the router).
- Open a web browser and enter your router's IP address (common addresses are 192.168.0.1 or 192.168.1.1).
- Log in using the default username and password (often "admin" for both, but check your router's manual).

Step 2: Update Router Firmware
Before configuring, ensure your router's firmware is up-to-date:
- Look for a "Firmware Update" or "Router Update" option in the admin panel.
- If an update is available, download and install it.
- Wait for the router to restart after the update.
Step 3: Change Default Login Credentials
To prevent unauthorized access to your router settings:
- Find the "Administration" or "System" settings.
- Change both the username and password to something strong and unique.
- Save the changes and log in again with your new credentials.
Step 4: Set Up Wi-Fi Security
Now, let's secure your Wi-Fi network:
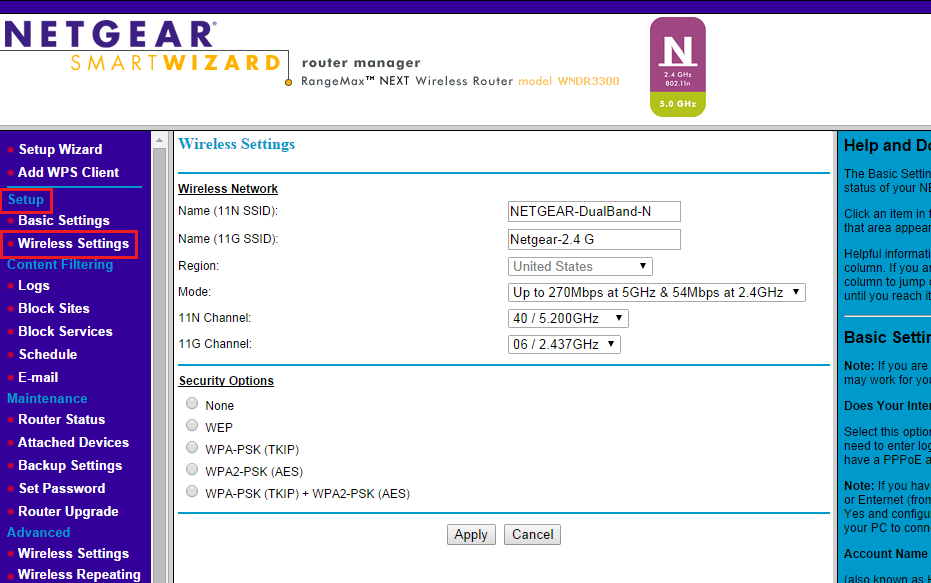
- Find the "Wireless" or "Wi-Fi" settings.
- Change your network name (SSID) to something unique but not personally identifiable.
- Choose WPA3 encryption if available, or WPA2 if not.
- Set a strong Wi-Fi password (at least 12 characters with a mix of letters, numbers, and symbols).
- Save the changes.

Step 5: Enable Additional Security Features
Many routers offer extra security options:
- Enable the built-in firewall if available.
- Turn off WPS (Wi-Fi Protected Setup) as it can be a security vulnerability.
- Disable remote administration to prevent external access to your router settings.
Step 6: Set Up Guest Network (Optional)
If your router supports it, set up a guest network for visitors:
- Find the "Guest Network" settings.
- Enable the guest network and give it a different name from your main network.
- Set a separate password for the guest network.
- Enable network isolation to prevent guest devices from accessing your main network.
Step 7: Connect Your Devices
Finally, connect your devices to the new secure network:
- On each device, find your new network name in the Wi-Fi settings.
- Enter the new Wi-Fi password you created.
- Confirm that you can connect and access the internet.
Additional Tips
- Regularly update your router's firmware to patch security vulnerabilities.
- Change your Wi-Fi password periodically (e.g., every 3-6 months).
- Consider using a VPN for an extra layer of security when browsing.
- Keep an eye on connected devices and remove any you don't recognize.
Conclusion
By following these steps, you've significantly improved the security of your home Wi-Fi network. Remember, cybersecurity is an ongoing process, so stay informed about best practices and regularly review your network settings.